
Flat Roofing Trims Buying Guide for UK Projects

A flat roof can have a sound covering and still fail at its most exposed points if the perimeter detail is poorly finished. This flat roofing trims buying guide is designed to help installers, builders and homeowners choose the right trims for a neat, weather-resistant result that is built to last.
Roof trims do more than improve appearance. They direct rainwater, protect vulnerable roof edges, support the roofing membrane or laminate, and provide a clean transition at walls, corners and gutters. Selecting the correct profile before work begins avoids delays on site and prevents awkward compromises once the roof covering is in place.
What flat roofing trims are designed to do
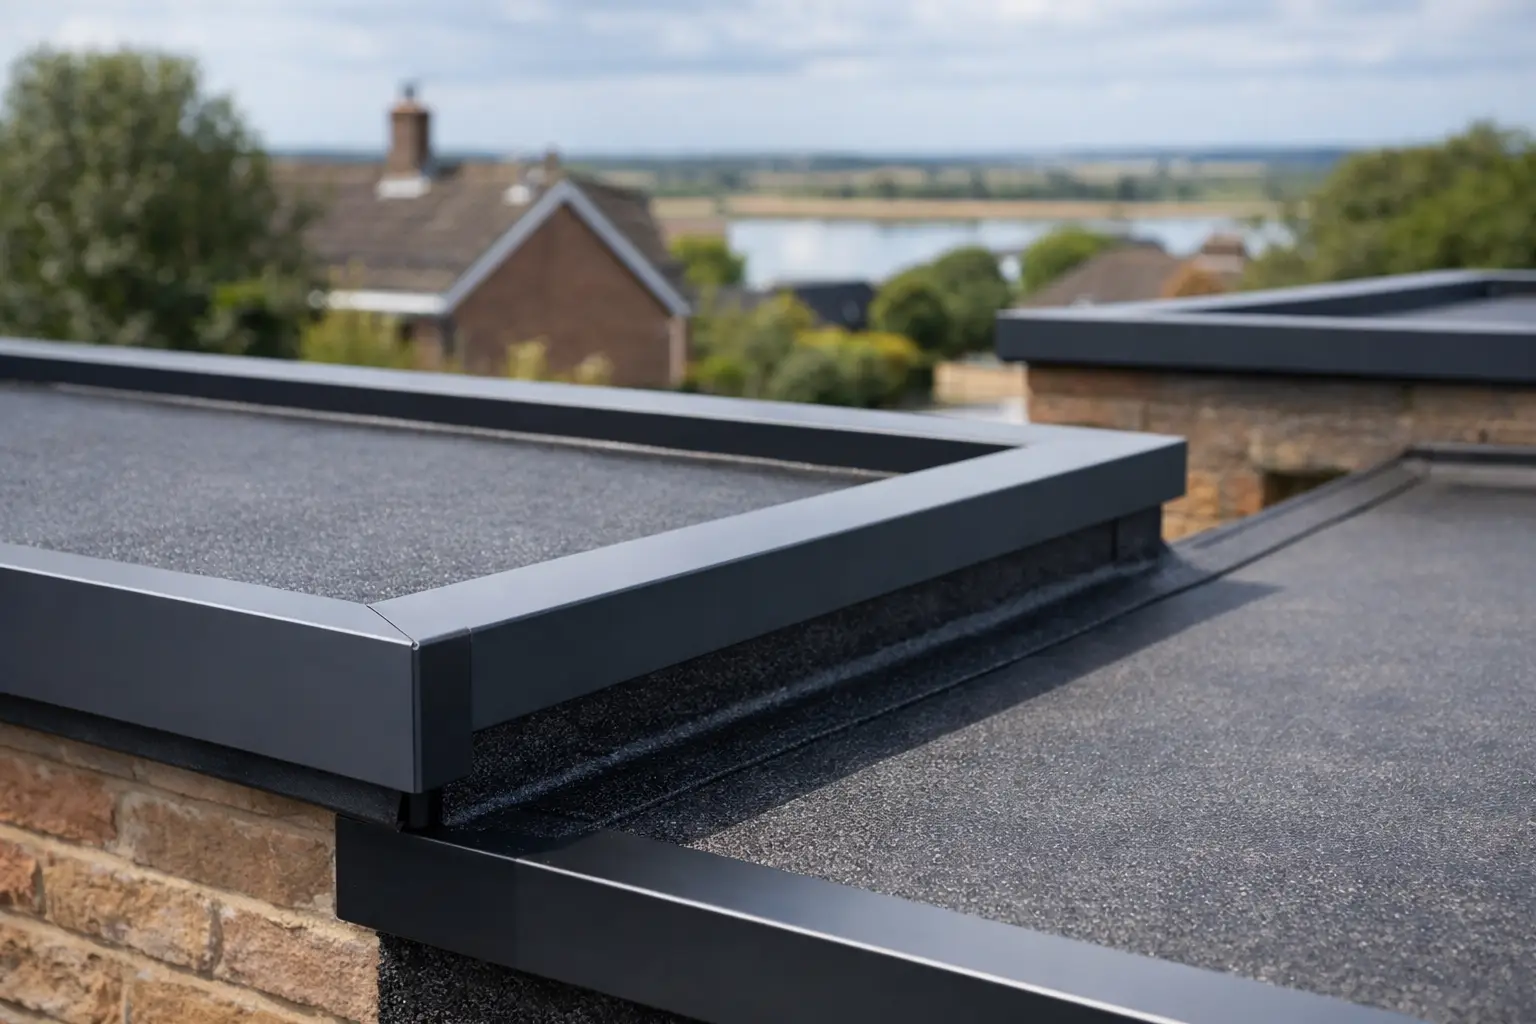
Flat roofing trims form the finished edge detail around the roof perimeter. On a fibreglass roof, GRP trims are commonly incorporated into the laminate to create a strong, continuous waterproof edge. Other roof systems use purpose-made metal, plastic or membrane-compatible edge details.
The right trim arrangement manages water in the direction intended by the roof design. At the lower edge, it should encourage water into the gutter. At side edges and abutments, it should prevent wind-driven rain from reaching the roof deck or fascia. Corners and joins must complete that protective line without leaving weak points.
A trim also has a practical visual role. Straight, consistent edges make a roof look properly installed, while poorly matched profiles or makeshift joins can spoil an otherwise good job.
Start with the roofing system, not the trim shape
The first buying decision is compatibility. Flat roofing trims are not universal, even where profiles appear similar. A GRP edge trim is designed to work with a fibreglass laminate and resin process, while an EPDM or single-ply system generally requires its own compatible termination, drip or edge restraint components.
Mixing materials without checking their intended use can create problems with adhesion, movement and long-term weathering. For example, a trim that works well when laminated into GRP may not provide the correct fixing or seal for a rubber membrane. Always buy trims that are specified for the roof covering being installed.
It is equally sensible to keep profiles, corners, outlets and jointing components within the same system where possible. This helps ensure dimensions align and avoids having to modify parts on site. A small saving from mixing ranges can quickly disappear if an installer has to cut, pack out or reseal incompatible pieces.
Check the roof build-up
Before ordering, confirm the deck material, insulation arrangement, fascia depth and gutter position. The trim needs to suit the finished roof build-up, not just the board size shown on a drawing.
Pay particular attention to roof falls. Water must travel towards the drainage point without being held back by an incorrectly selected edge detail. If the roof has an unusually deep build-up or a non-standard eaves arrangement, measure from the final finished surface down to the fascia and gutter rather than estimating from the deck alone.
The main trim types to plan for
Most flat roof installations need more than one profile. The exact combination depends on the roof shape and drainage layout, but the following details are common on GRP flat roofs.
Drip trims at the gutter edge
A drip trim is used at the lowest edge of the roof, where rainwater needs to run cleanly into a gutter. Its shaped front edge projects water away from the fascia, reducing the risk of staining, dampness and overflow tracking behind the gutter.
Check that the drip projects far enough to discharge into the gutter, especially where gutter brackets or deep fascia boards affect its position. A trim that ends short of the gutter can allow water to run down the face of the fascia instead.
Raised edge and verge trims
Raised edge trims are fitted along side edges where water should not leave the roof. They create an upstand that helps contain surface water and protects the edge of the roof covering from wind uplift and impact.
Profile height matters. A low edge may be suitable on a sheltered small roof with a straightforward fall, but exposed locations and roofs with more complex drainage may require a more substantial detail. The aim is to prevent water spilling over the side while maintaining a tidy, proportionate finish.
Wall flashing trims
Where a flat roof meets a wall, the junction needs careful treatment. A wall flashing trim or compatible abutment detail protects the upper edge of the roof covering and helps stop water tracking behind it.
The correct approach depends on the wall construction and roof system. Do not treat a wall junction as an afterthought. Measure the required upstand and allow for the way the flashing will be fixed and sealed before ordering materials.
Internal and external corners
Pre-formed corners make it easier to maintain a consistent waterproof detail where trim runs meet. Internal corners are used where two edges meet inwardly, while external corners finish projecting outside angles.
Although corners can sometimes be formed from straight lengths, pre-formed components save time and reduce the number of cuts and joints. They are particularly worthwhile where appearance matters or where site conditions make accurate fabrication difficult.
How to calculate quantities accurately
Measure every roof edge separately and record which trim type each run requires. Do not rely only on the overall length and width of the roof, as drainage edges, side edges and wall abutments need different profiles.
Order enough straight trim for each run, allowing for cuts, overlaps where required by the system, and a sensible amount of waste. Longer lengths can reduce the number of joints, but they need careful handling and suitable transport to avoid distortion. On smaller domestic jobs, manageable lengths may be easier to position accurately.
Count corners, outlets, stop ends and joint pieces individually. A roof with four sides may seem simple, but a change in level, return, parapet or doorway can introduce extra details. It is far better to identify these before delivery than pause a job because one corner component is missing.
Choosing between cost, finish and installation speed
The cheapest trim is not always the best value. A poorly suited profile may require more sealing, more cutting and more labour, with no guarantee of a better result. Trade-quality trims are manufactured to provide consistent dimensions and a dependable finish when used as part of the correct roofing system.
For professional installers, pre-formed corners and matched accessories can shorten fitting time and improve consistency across repeated jobs. For homeowners and self-build customers, they remove some of the uncertainty from a detail that can otherwise be difficult to form neatly.
Colour can also affect the finished appearance. Black and dark grey trims are often selected to complement modern fascias and roof finishes, but availability varies by range. Prioritise system compatibility and correct water management first, then choose the colour and profile that best suits the property.
Checks to make before placing an order
A short final check can prevent the most common ordering errors:
- Confirm the roofing system and buy trims made for that system.
- Separate gutter edges, side edges, wall abutments and corners on your cutting plan.
- Measure the finished build-up, including fascia depth and gutter position.
- Check whether pre-formed corners, outlets, stop ends or joint pieces are needed.
- Allow for cuts, handling and the manufacturer’s stated fixing or overlap requirements.
Also consider delivery and storage. Long trim sections should be supported during transport and stored flat on a clean, level surface where possible. Damaged or bent profiles can be difficult to straighten without affecting the final line of the roof edge.
Installation details that protect the finished roof
Correct fitting is as important as selecting the right trim. Follow the product instructions for fixing centres, overlap direction, joint treatment and any resin, adhesive or sealant requirements. These details vary between systems, so a general rule is not a substitute for the manufacturer’s method.
Keep trim lines straight and ensure the roof deck edge is sound before installation. If the fascia is uneven, address that first rather than forcing the trim to follow it. A trim can only provide a clean finish when the structure beneath it is properly prepared.
At drainage edges, check the flow of water before the job is signed off. At corners and joints, inspect for gaps, sharp exposed edges or incomplete seals. These are small checks, but they are often where long-term problems begin.
Buying flat roofing trims should be a planned part of the roof build, not a last-minute purchase. With the right system-compatible profiles, accurate measurements and all corners and accessories accounted for, the roof edge will look clean, drain properly and provide the dependable protection the whole installation relies on.
Share This Article
Follow Us
Latest Articles
August 8, 2026

August 6, 2026

August 4, 2026
