
How to Choose Roofing Trims for Flat Roofs

A flat roof edge is where good workmanship becomes visible. The membrane may cover the main roof area, but without the right trim, water can track behind the finish, wind can lift exposed edges, and the whole installation can look incomplete. Knowing how to choose roofing trims means matching each profile to the roof design, the covering system and the route water needs to take.
For trade installers, choosing correctly avoids return visits and awkward finishing details. For homeowners and self-build customers, it provides confidence that the roof will have a clean, durable edge rather than relying on a makeshift solution. The right trims do more than improve appearance – they protect the vulnerable perimeter of the roof.
Start with the roof edge, not the trim
Before selecting a profile, identify every edge and junction on the roof. A flat roof commonly has a gutter edge, one or more exposed outer edges, wall abutments and corners. Each has a different job, so one trim profile will not suit the entire roof.
The gutter edge needs to direct rainwater into the gutter or drainage system without allowing it to run back underneath the roof finish. Exposed sides need a raised, weather-resistant edge that protects the roof covering from wind and prevents water escaping over the side. Where the roof meets a wall, the detail must stop water tracking into the joint. Corners and trim joins also need their own compatible components to maintain a continuous finish.
Measure the roof perimeter and sketch these details before ordering. This gives you a practical trim schedule and helps avoid mixing profiles that look similar but perform different functions.
How to choose roofing trims by profile
For many flat roofing systems, the main profiles are selected according to where they sit on the roof.
Gutter drip trims
A gutter drip trim is fitted along the lower edge where water leaves the roof. Its purpose is to project water clear of the fascia and into the gutter. A correctly positioned drip detail reduces staining, moisture exposure and the risk of water being drawn back beneath the roof covering.
Check the position of the gutter before choosing the trim. The drip must overhang sufficiently to discharge into the gutter, while still allowing a secure fixing and proper integration with the chosen roofing system. If the gutter is set too far from the roof edge, a standard profile may not provide the required projection.
Raised edge and fascia trims
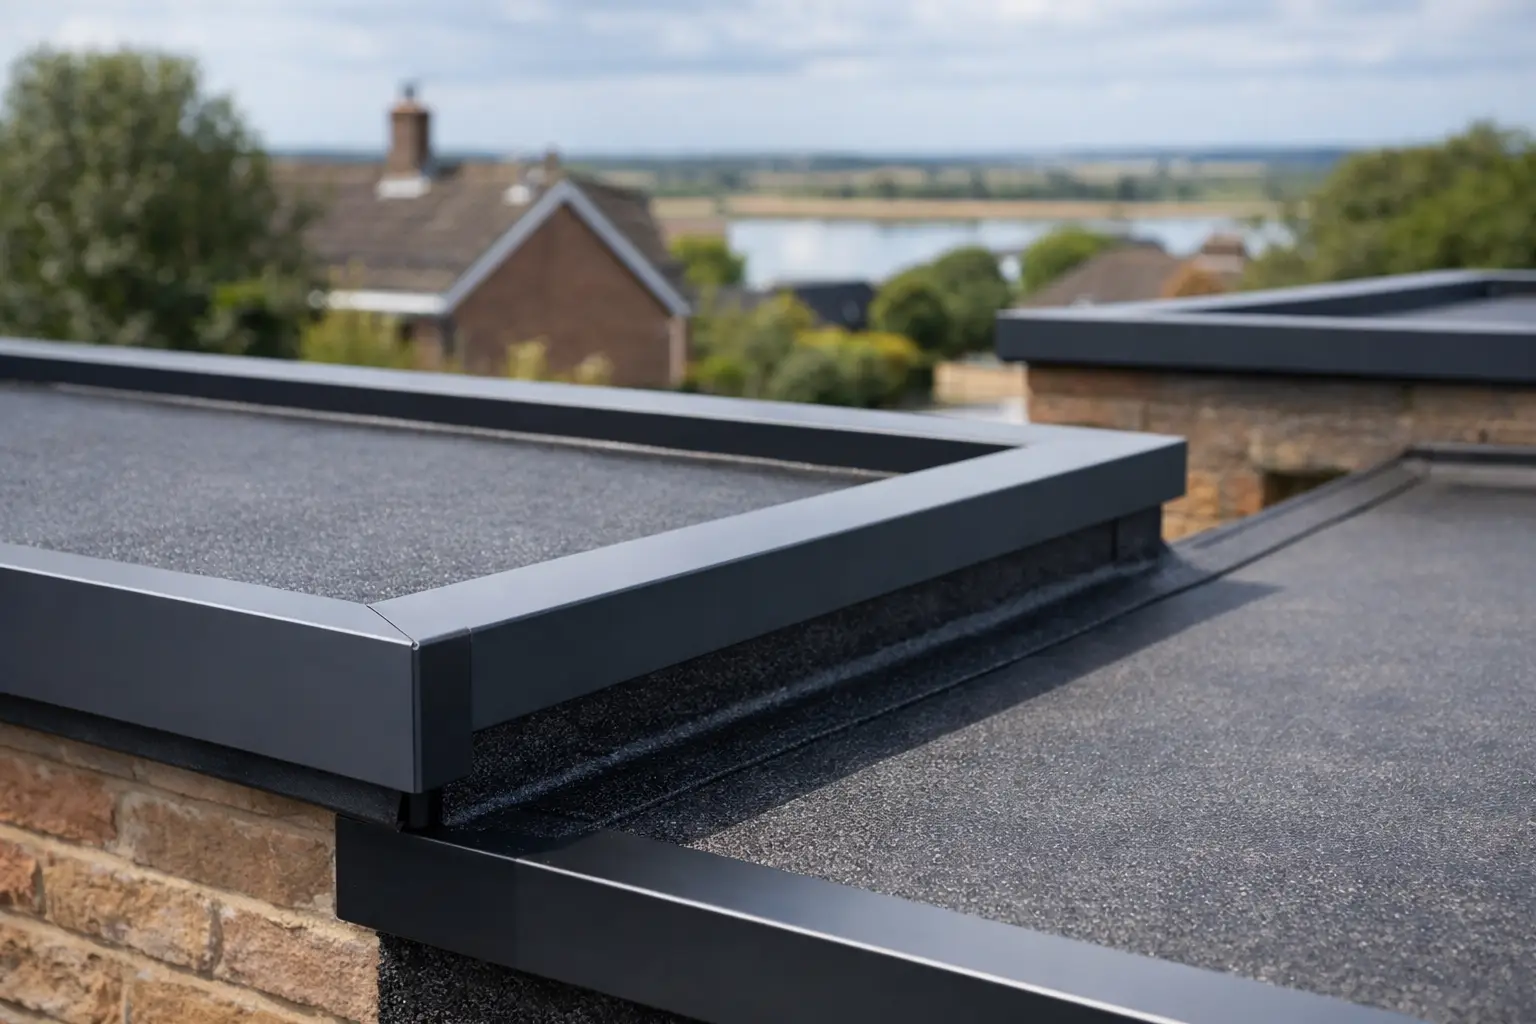
Raised edge trims are used on exposed roof sides where water should be retained on the roof surface and guided towards drainage points. They create a neat perimeter while protecting the edge of the roof finish from weather and wind uplift.
The height of the upstand matters. A shallow profile may be suitable for a low-profile roof with limited exposure, while a more substantial raised edge can be the better choice where wind exposure, roof build-up or expected water flow demands it. Select a profile that gives adequate cover to the roof edge without creating an awkward or oversized finish.
Wall flashing trims
Where a flat roof meets a wall, a wall flashing trim helps form a weatherproof transition. This detail is particularly important because movement, uneven masonry and poor laps can all create a route for water ingress.
Check whether the trim is designed to work as part of your specific roof covering system and consider how it will terminate at each end. The wall surface must also be suitable for the fixing or sealant method required. A trim alone cannot compensate for loose render, damaged pointing or an uneven junction.
Corners, joints and closures
Pre-formed corners, joint pieces and end closures are often worth specifying rather than trying to create every detail on site. They save time, improve consistency and reduce the risk of weak points at cuts and overlaps.
This is especially useful on visible domestic work, but it also makes sense for trade installations where speed and repeatable quality matter. Use components from the same trim range wherever possible, as profiles from different systems may not align or seal correctly.
Match the trim material to the roofing system
Compatibility is one of the most important buying checks. Roofing trims are not generic finishing strips. They are designed around particular roof coverings, adhesives, resins, sealants and installation methods.
For GRP roofing, GRP edge trims are commonly installed as part of the laminated roof system, allowing the trim and roof surface to form a continuous reinforced finish. The trim needs to be suitable for the resin and topcoat being used, with a clean, prepared surface for reliable bonding.
For other flat roofing systems, use trims and accessories specified for that membrane type. A profile that physically fits the roof edge may still be unsuitable if the adhesive will not bond properly, the material reacts with the membrane or the fixing detail compromises the waterproof layer.
When comparing products, confirm the following before ordering:
- the roof covering or membrane the trim is intended to work with;
- the required adhesive, resin, sealant and mechanical fixings;
- whether joints, corners and outlets are available in the same range;
- the trim length, cover dimensions and finished profile height.
If you are replacing only part of an existing roof edge, take extra care. A new trim may not integrate reliably with an older covering system, even if the colour and shape appear close. In some cases, replacing the full edge detail is the more dependable option.
Consider drainage and roof fall
A trim cannot correct poor drainage, but it must support the drainage design. Water should fall towards the intended outlet, gutter or drainage channel rather than collecting against a raised edge or wall junction.
Check the roof fall before fixing trims, particularly on refurbishment work. If standing water regularly sits at the perimeter, the issue may be the deck, insulation build-up or drainage position rather than the trim selection. Fitting a larger raised profile might hide the problem temporarily, but it will not remove the load placed on the roof finish.
At gutter edges, make sure the drip line aligns with the gutter. At outlets and corners, avoid details that interrupt the flow of water. A neat finish is valuable, but the best-looking trim is the wrong choice if it sends water where it should not go.
Check dimensions before placing the order
Roofing trims are often sold in standard lengths, so calculate the required quantity from the actual perimeter, then allow for cuts, overlaps and waste. This is particularly relevant where there are several short returns, corners or changes in direction.
Do not rely only on the overall roof size. Measure each edge separately and note which profile belongs to it. For example, a 6-metre by 4-metre roof may require two gutter drip lengths, two raised-edge lengths, four corners and separate wall flashing components. The total length alone does not tell you what to buy.
Also check the roof build-up. The trim must cover the deck edge and work with the thickness of any insulation, boarding and roof covering. A profile that is too shallow can leave the edge exposed; one that is too deep can look disproportionate and make fixing more difficult.
Think about exposure, durability and appearance
A roof on a sheltered rear extension faces different demands from one on an exposed garage, outbuilding or coastal property. Wind exposure, driving rain and regular foot traffic during maintenance all affect the detail required at the perimeter.
Choose trade-quality trims with sufficient rigidity and a finish suited to long-term outdoor use. Thin or poorly formed products can flex during installation and may not provide a clean line once fixed. Durability matters most at edges because they are more exposed than the central roof area.
Colour is also worth considering, particularly where the roof edge is visible from ground level. Black remains a practical, widely used option for many flat roof finishes, but the priority should always be compatible material and correct performance. A matching colour does not make an incompatible trim suitable.
Plan the fitting sequence
Even the right profile can underperform if it is fitted in the wrong order. Follow the installation guidance for the roofing system, including substrate preparation, fixing centres, joint treatment and curing times. The sequence may vary depending on the trim type and roof covering.
Dry-fit the main lengths before applying adhesive or resin. This lets you check corner alignment, drainage direction and cut positions while adjustments are still straightforward. Keep cuts square and smooth, and use the recommended jointing method rather than relying on sealant as a substitute for a properly formed joint.
If you are unsure about compatibility or which profiles are needed, speak to a specialist supplier before starting. Quality Roofing Supplies Ltd can help customers identify practical trim options for flat roofing projects, whether you are ordering for a regular installation or a one-off repair.
A well-chosen roofing trim should disappear into the job in the best possible way: it directs water where it belongs, protects the roof edge and leaves a straight, professional finish that continues to do its work long after installation day.
Share This Article
Follow Us
Latest Articles
August 8, 2026

August 6, 2026
August 4, 2026
