
How to Fit Edge Trims Properly

A neat roof edge does more than improve the finish. If you are learning how to fit edge trims, you are really dealing with water control, wind resistance and the long-term performance of the roof perimeter. Get the trim wrong and even a well-laid flat roof can end up looking poor or allowing avoidable problems at the edges.
For trade installers, edge trims are part of a system and need to be fitted accurately first time. For homeowners and self-build customers, the main challenge is usually knowing where the trim sits, how it is fixed and what makes a clean, weatherproof result. The good news is that fitting edge trims is straightforward when the right trim is matched to the roof build-up and installed in the correct sequence.
What edge trims do on a flat roof
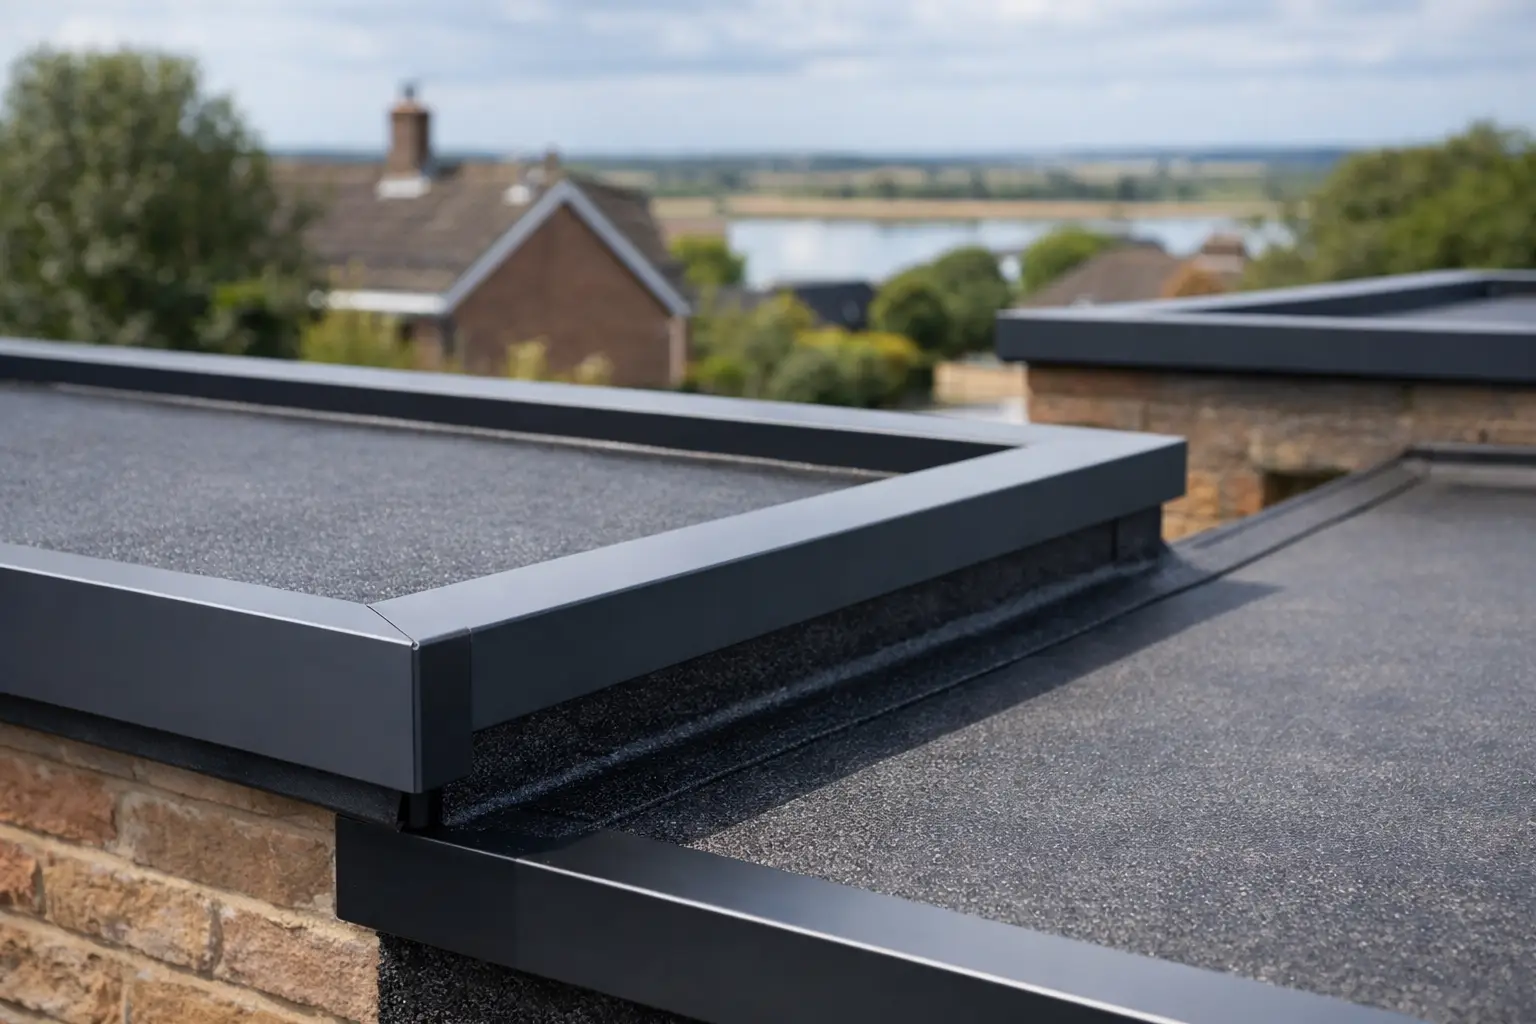
Edge trims are fitted to the roof perimeter to protect exposed edges and help manage rainwater. Depending on the roof layout, they can form a drip edge, a raised edge or a termination point where the waterproofing meets the roof edge. They also give the roof a more professional finish, which matters on visible extensions, garages, porches and outbuildings.
In practical terms, trims help stop water tracking back into the roof structure. They support the membrane or felt at the edge, reduce the risk of wind lifting and protect fascia details from unnecessary exposure. That means the trim is not just a cosmetic extra. It is part of the working detail of the roof.
The exact fitting method depends on the trim profile and the roofing system being used. A felt roof detail will differ slightly from a single-ply or other flat roofing application, so it always pays to check compatibility before you start.
Before you fit edge trims
The main causes of poor trim installation are usually simple: the wrong profile, inaccurate measuring or fixing into a weak substrate. Before fitting anything, make sure the roof deck edge is sound, straight and dry. If the timber edge is damaged, swollen or uneven, the trim will not sit properly and any waviness will show along the finished perimeter.
You should also confirm whether you need a drip trim, an upstand trim or a combination of profiles around the roof. Front edges and side or back edges often need different trim types because they handle water differently. Using one profile everywhere can create drainage issues.
Check the roof falls as well. Water should be directed towards the correct discharge point, not trapped against an edge detail. If the fall is poor, even a correctly fitted trim will not compensate for standing water.
Tools and materials you will usually need
Most installations only require standard roofing tools: a tape measure, marker, straight edge, drill or driver, suitable fixings, sealant where required, and a saw or snips depending on the trim material. You may also need jointing pieces, corners and matching clips if the trim system uses them.
Fixings matter. They need to suit both the trim and the substrate, and they should be corrosion-resistant for external use. On exposed sites, spacing and secure mechanical fixing become even more important because roof edges take the brunt of wind uplift.
How to fit edge trims step by step
Start by measuring each roof edge carefully. Do not assume opposite sides are identical, especially on older roofs or timber structures that may be slightly out. Measure each run separately and allow for joints, corners and any manufacturer-recommended expansion gap if the trim material requires it.
Offer the first length into position dry before fixing. This lets you check alignment and overhang. The trim should sit neatly along the edge without forcing it into place. If the deck edge is uneven, deal with that first rather than trying to pull the trim straight with fixings.
Once you are happy with the position, begin fixing from one end and work along steadily. Keep the trim level and avoid over-tightening screws, as this can distort thinner metal profiles. A distorted trim will be harder to join cleanly and may leave the edge looking rippled.
Fixing centres depend on the trim type and site conditions, but even spacing is key. Too few fixings can leave movement in the profile, while too many can create unnecessary stress points. If the system includes a rear fixing leg and face fixing detail, make sure both are installed as intended rather than relying on one line of fixing alone.
Where the roof covering meets the trim, follow the roofing system detail closely. On felt applications, the trim usually needs to integrate with the felt layers so water sheds over the edge correctly. The sequence matters. If the trim is fitted at the wrong stage, the waterproofing detail may be compromised even if the trim itself feels solid.
How to fit edge trim joints and corners
Joints and corners are where installation standards really show. A long straight run is usually simple. External corners, internal corners and trim joints are the parts most likely to look untidy or leak if rushed.
When joining two lengths, use the correct joint piece or method for the trim system. Leave any required gap for thermal movement. This is especially important on longer runs or sun-exposed elevations, where expansion and contraction can put pressure on the joint. Pushing trims tightly together might look neat on the day, but it can cause buckling later.
Corners should be purpose-made where possible. Site-cut corners can work, but they need accuracy and the right finishing detail. A poor corner cut leaves visible gaps and weak points for water ingress. On a domestic project this affects appearance straight away. On a trade installation it can also create a call-back risk.
Check the line of the trim after every joint and corner. Small deviations are easier to correct immediately than once the full perimeter is fixed.
Common mistakes when fitting edge trims
One common mistake is fitting trims onto an edge that has not been prepared properly. If the timber below is rotten, uneven or loose, no trim will perform as it should. Another is choosing the wrong profile for the edge location. A trim intended for one edge detail may not provide the correct drip or upstand elsewhere.
Another issue is poor fixing practice. Inadequate fixings, uneven spacing or overtightened screws can all affect the finished line and long-term security of the trim. On exposed roofs, this is not a small detail. Wind pressure at the perimeter can be significant.
Installers also sometimes overlook movement at joints. Metal trims in particular need room to expand and contract. Ignoring that can lead to stress at corners, noisy movement or visible distortion over time.
Finally, there is the temptation to treat trims as the last cosmetic part of the job. In reality, edge trims should be planned as part of the roof system from the start. That affects material choice, perimeter build-up and waterproofing sequence.
It depends on the roof system
There is no single answer to how to fit edge trims because the best method depends on the roof covering, the substrate and the edge detail you are forming. A small porch roof is not the same as a larger garage or extension, and an exposed coastal site may need a more careful fixing approach than a sheltered location inland.
If you are working on a new roof, it is easier to build the trim detail in from the beginning. On a refurbishment, you may need to work around existing fascia levels, deck condition or previous roof build-up. That can affect trim depth and how the waterproofing terminates.
For homeowners, this is often the point where buying support matters. Getting the right trim profile before installation is far easier than trying to adapt the wrong one on site. For trade buyers, it is usually a matter of matching the product spec to the job so the installation runs without delays.
Getting a clean, professional finish
A good trim installation should look straight, sit tight to the edge and direct water away cleanly. You should not see obvious gaps, misaligned joints or waviness along the face. The fixings should be neat and consistent, and the roofing finish should integrate with the trim detail rather than stopping awkwardly short or bunching against it.
Take a little extra time on setting out. Most finishing problems start before the first screw goes in. Accurate measurement, dry fitting and careful alignment usually make the difference between an acceptable result and a properly finished roof edge.
If you are ordering materials for a flat roofing project, it is worth checking trim type, length, jointing options and compatible accessories at the same time. Quality Roofing Supplies Ltd serves both trade and public customers with practical roofing products designed for real installation work, which helps take some of the guesswork out of choosing the right components.
A roof edge is one of the first details people notice and one of the first places weather will test, so fit the trim with the same care you give the rest of the roof.
Share This Article
Follow Us
Latest Articles
August 8, 2026
August 6, 2026
August 4, 2026
