
Roofing Accessories Selection Guide for UK Roofs

A flat roof rarely fails because one main material was chosen badly. More often, problems begin at the edges, outlets, joints and penetrations where water needs a clear route away from the roof. This roofing accessories selection guide explains how to choose the smaller components that help a roofing system perform properly, whether you are fitting a new roof, repairing a weak detail or planning a domestic upgrade.
Start with the roofing system, not the accessory
Accessories must suit the membrane, surface finish and construction of the roof. An edge trim that looks suitable may still be the wrong profile, material or fixing method for the system being installed. Likewise, a sealant that bonds well to one surface may be unsuitable for another.
Before ordering, establish the roof build-up: the deck type, waterproofing material, insulation arrangement, roof perimeter and drainage position. This gives you the information needed to match trims, outlets, fixings and roof lights correctly. It also avoids the costly situation where materials arrive on site but cannot be used together.
For contractors, this check should sit alongside the specification and manufacturer guidance. For homeowners, it is sensible to confirm the intended materials with an installer before placing an order. A few measurements and photographs of the existing roof detail can prevent an incorrect purchase.
Roofing accessories selection guide: the key decisions
The most useful way to select accessories is to work around the roof in the same order that water meets it. Start at the perimeter, then consider drainage, openings and final weatherproofing details.
Choose edge trims for the roof perimeter
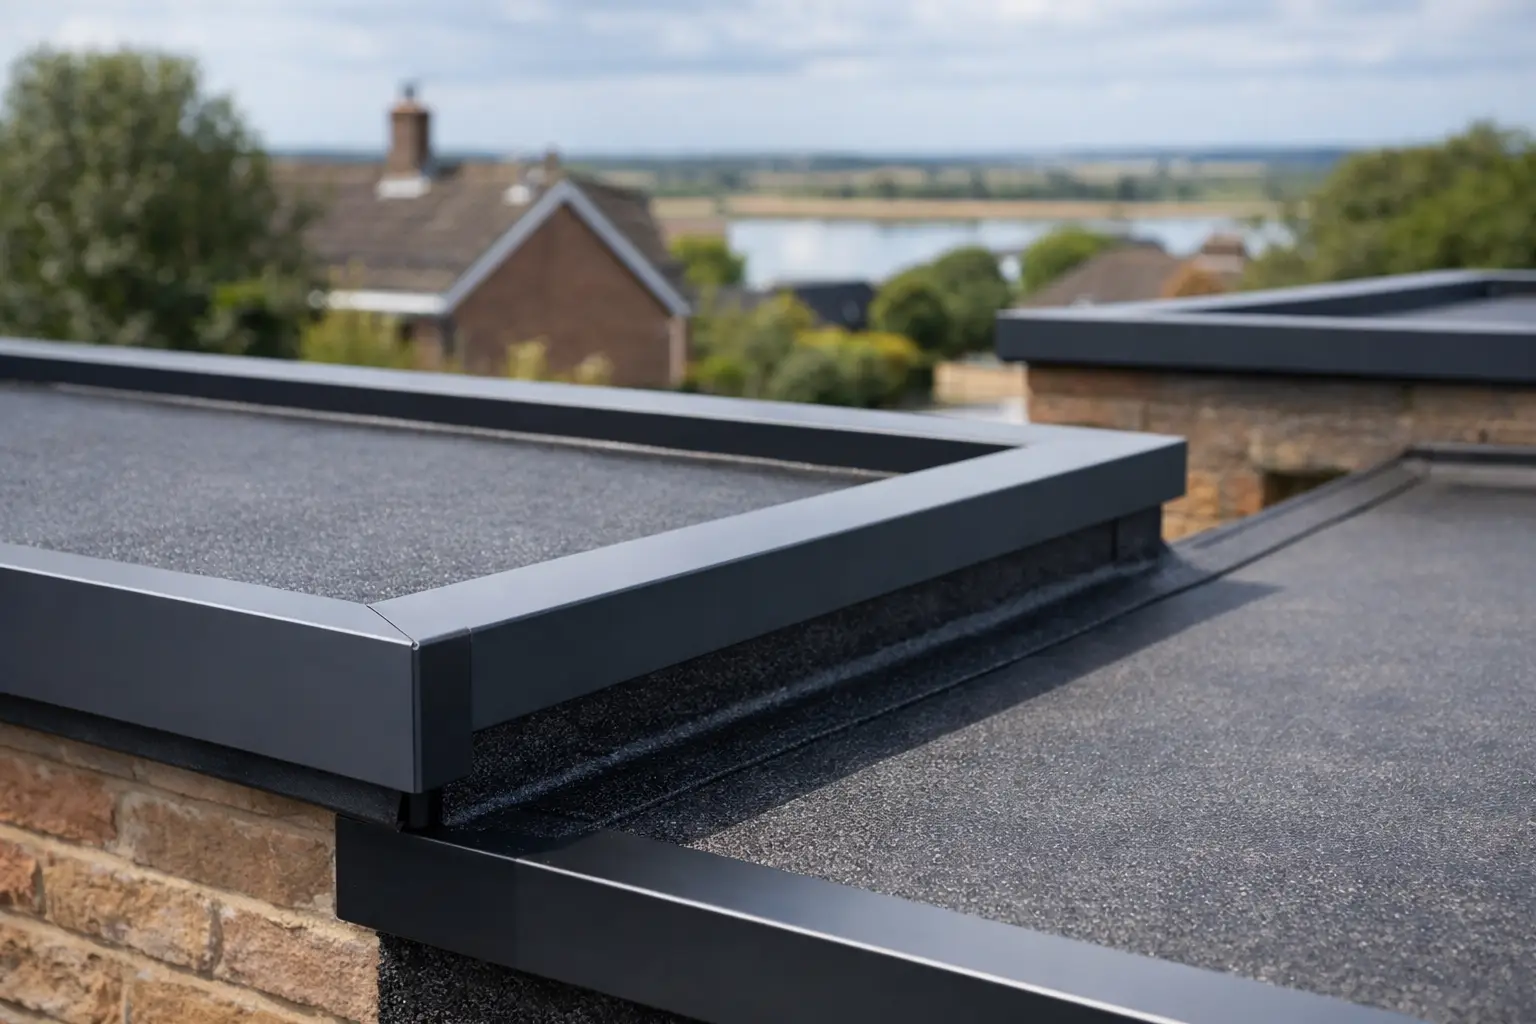
Roof edge trims protect exposed membrane edges, direct water into the gutter and give the roof a clean, durable finish. They are not interchangeable. A drip trim is designed for the lower edge where rainwater needs to discharge into a gutter, while a fascia trim finishes the roof edge and can conceal the edge of the deck or fascia.
Raised edges need a suitable perimeter trim or upstand detail, particularly where the roof meets a wall, parapet or adjoining structure. The profile depth matters. A trim that is too shallow may not cover the build-up adequately, while one that is oversized can be harder to secure neatly and may look out of proportion.
Consider material as well as profile. Aluminium trims are widely used for their clean appearance, corrosion resistance and long service life. They should be selected with compatible corners, joints and fixings so the full perimeter works as one system. Saving money by mixing unmatched sections can create awkward joints and weak points where water may track behind the trim.
Plan drainage before choosing outlets
Standing water places unnecessary strain on any flat roofing surface. The roof should have an effective fall towards its intended drainage point, and the outlet needs to suit the location and water volume expected.
A standard outlet may be suitable where water drains through the roof into a downpipe. A scupper-style outlet may be required where water exits through a parapet or wall detail. The outlet size must also match the pipework and expected flow. On larger roofs, or roofs with complicated shapes, one outlet is not always enough.
Leaf guards and gravel guards can be worthwhile where debris is likely to collect. They reduce the chance of a blocked outlet, but they are not a substitute for routine inspection and clearing. If an outlet is difficult to reach once the work is complete, choose a detail that can be checked and maintained without disturbing the waterproofing.
Treat corners and joints as system components
Corners, connectors and joint pieces often receive less attention than long lengths of trim, yet they are where accuracy matters most. Purpose-made internal and external corners help maintain a consistent finish and reduce the need for site-cut sections. They can save fitting time and produce a more reliable result, especially on visible domestic work.
Where trim sections join, allow for expansion and use the recommended jointing method. Metal moves with changing temperatures. A tightly butted joint with no allowance for movement may distort over time or open the seal between sections. This is a small detail, but it has a direct effect on appearance and weather resistance.
Select roof lights as part of the roof build-up
A roof light changes more than the amount of daylight in a room. It introduces an opening into the roof, so the kerb, upstand, flashing detail and insulation around it all need to be considered from the start.
Choose a roof light size that suits both the room below and the structural opening above. Larger units bring more natural light but may require additional structural consideration and can affect thermal performance if the specification is not right. Check the glazing type, thermal values, opening requirements and safe access for installation.
The upstand height is particularly important. It should provide adequate separation between the roof surface and the roof light, allowing the waterproofing to be dressed correctly. A low or poorly formed upstand can make a good roof light vulnerable to water ingress. Where possible, select components designed to work together rather than relying on improvised site details.
Match sealants, tapes and fixings carefully
Sealants and tapes are useful finishing materials, not a cure for poor detailing. The right product can provide a durable weatherproof seal at joints and penetrations, but it must be compatible with the surfaces it contacts and applied to clean, dry material as directed.
Check whether the sealant is intended for external roofing use, its adhesion to the trim or membrane material, and the conditions required for application. Cold, wet or dusty surfaces can affect bonding. If the work is being carried out during changeable UK weather, plan installation around the product’s stated temperature and curing requirements.
Fixings deserve the same care. They need to be suitable for the trim material and the substrate beneath it. Incorrect fasteners may corrode, pull loose or damage the trim. Use the specified spacing and avoid over-tightening, which can distort lightweight sections and restrict natural movement.
Balance price against the cost of rework
The cheapest accessory is not always the best value. A low-cost outlet, trim or sealant can become expensive if it fails early, delays installation or forces part of the roof to be opened again. This matters on both trade jobs and home projects, where labour, access equipment and disruption can quickly exceed the cost of the original component.
That does not mean every project needs the most expensive option. The right choice depends on the roof size, exposure, expected lifespan and finish required. A small repair may need only a practical, compatible replacement part. A new extension, garage roof or commercial refurbishment may justify a complete matched trim and drainage package for better consistency and longer-term confidence.
Quality Roofing Supplies Ltd focuses on trade-quality roofing materials that are practical to specify and install. Choosing compatible accessories at the same time as the main roofing materials also helps keep the job moving, rather than pausing midway through installation for a missing corner, outlet or fixing pack.
Check these details before ordering
A final review is useful before adding products to the basket, particularly when buying online. Confirm the following points against your measurements and roof plan:
- The trim profile and depth suit the roof edge and waterproofing build-up.
- Outlet type, size and position match the drainage layout and pipework.
- Corners, joints, stop ends and fixings have been included in the required quantities.
- Sealants and tapes are compatible with the materials being joined.
- Roof lights, kerbs or upstands suit the structural opening and intended roof detail.
Order a modest allowance for cuts, offcuts and small adjustments where appropriate, but avoid guessing on profile sizes or drainage components. These are items that need to fit the roof, not simply fill a gap in the order.
When expert advice is worth using
Some selections are straightforward, especially when replacing like-for-like trims or outlets. Others need a closer look. Ask for guidance where the roof has multiple levels, parapets, awkward falls, several penetrations, unusual edge details or a roof light installation. It is also sensible to seek advice if you are unsure whether an existing detail is causing a leak.
Provide the roof dimensions, a description of the current materials, clear photos and the result you want to achieve. This makes it easier to identify the likely accessory type and reduces back-and-forth before delivery. For a contractor, it also creates a clearer materials list before work begins.
A well-finished roof is built from reliable details rather than last-minute fixes. Give the edges, outlets, joints and openings the same attention as the main waterproofing material, and the roof will be far easier to install, maintain and trust through the seasons.
Share This Article
Follow Us
Latest Articles
August 8, 2026

August 6, 2026

August 4, 2026
